Finding the out-of-Specification (OOS) results is one of the most stressful moments in a pharmaceutical quality control laboratory. A single unexpected result can put product release on hold, trigger investigations, and invite uncomfortable questions from QA, management, and sometimes even regulators.
But the truth is, every experienced QC professional eventually learns that an OOS result is not a failure. What matters most is how you handle it.
Let us walk through a clear approach to handling OOS results in pharmaceutical QC testing and understand exactly what to do from the moment you see an OOS result to the final batch decision.
What Is an OOS Result?
An Out-of-Specification result is any test result that falls outside the approved acceptance criteria defined in:
- Product specifications
- Pharmacopoeial monographs
- Regulatory filings
- Approved analytical methods
This applies to chemical tests, microbiological tests, in-process samples, finished products, stability samples, and raw materials.
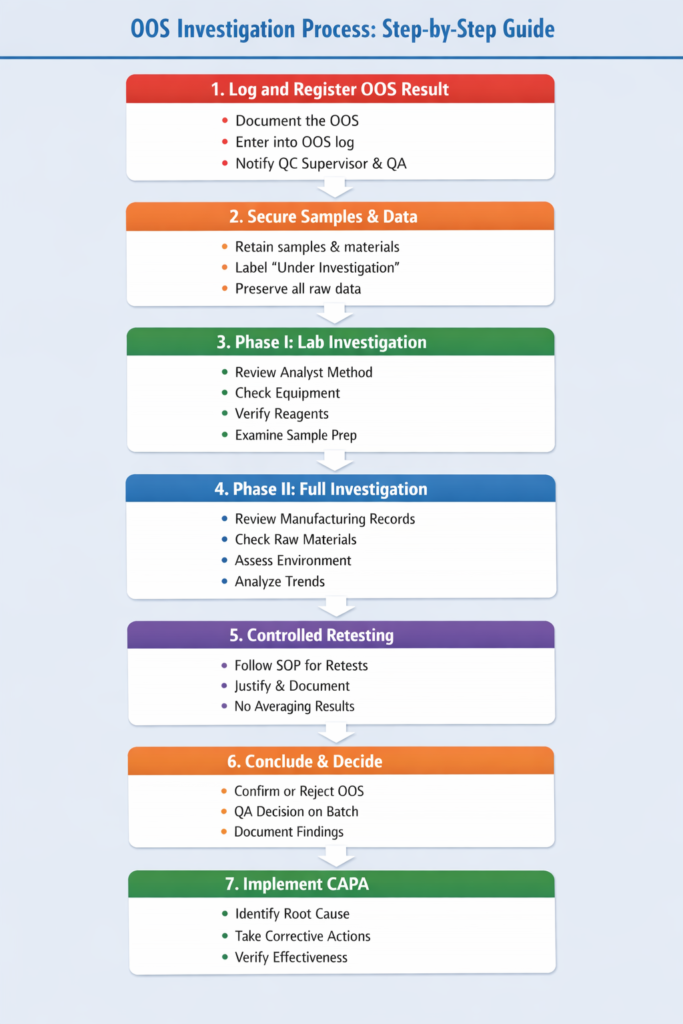
Step 1: Immediately Register the OOS Result
The moment the analyst observes a result outside specification, the first action is documentation, not discussion.
The analyst should:
- Record the result exactly as observed
- Inform the QC supervisor and QA without delay
- Enter the OOS into the OOS log or quality event system
- Note the test name, sample ID, batch number, date, and analyst name
Do not:
- Repeat the test on your own
- Discard samples, solutions, petri plates, or chromatograms
- Adjust calculations or rounding
At this point, treat the result as potentially valid.
Step 2: Secure Samples, Data, and Test Materials
Before any investigation starts, QC must secure everything related to the test.
This includes:
- Remaining sample portions
- Prepared solutions and standards
- Culture media, plates, and filters (for microbiology)
- Instrument printouts, raw data files, and worksheets
Label everything clearly as “Under OOS Investigation”. This prevents accidental reuse, disposal, or mix-ups.
Step 3: Phase I Investigation – Laboratory Assessment
Phase I focuses entirely on the laboratory.
The goal is to identify laboratory issues that could explain this result.
3.1 Review Analyst Performance
The supervisor should sit with the analyst and walk through the test step by step.
Actively check:
- Whether the analyst followed the approved method exactly
- Any deviation from the method, even if it seemed minor
- Unusual observations during the test
- Analyst training and qualification status
Ask direct questions:
- Did anything feel different during this test?
- Did you face time pressure or interruptions?
- Did you repeat any step outside the method?
Focus on understanding the process, not blaming the person. Encourage the analyst to share observations honestly.

3.2 Verify Instrument and Equipment Condition
Next, review the equipment used in the test.
Confirm that:
- The instrument had valid calibration at the time of use
- System suitability met acceptance criteria
- No alarms, errors, or abnormal behavior occurred
- Maintenance and usage logs show no issues
For chromatographic tests:
- Review injection sequence
- Check baseline stability
- Verify integration parameters
For microbiology:
- Check incubator temperatures
- Verify autoclave cycles
- Confirm laminar airflow conditions
- No growth in negative controls
- Cross-contaminations
- Cleaning records
3.3 Check Reagents, Media, and Standards
Now move to everything added to the sample.
Review:
- Reagent preparation records
- Lot numbers and expiry dates
- Storage conditions
- Media growth promotion results
- Standard preparation and dilution steps
Confirm that:
- The correct reagent or media was used
- No expired or compromised material entered the test
- Labels matched records
Even a small reagent error can create a big result shift.
3.4 Review Sample Handling and Preparation
Many OOS results trace back to sampling or preparation mistakes.
Check:
- Sample quantity weighed or measured
- Dilution steps and calculations
- Homogenization or mixing steps
- Sample labeling and traceability
Verify that:
- The analyst used the correct sample container
- No cross-contamination occurred
- The sample represented the batch accurately
Phase I Conclusion
If there is an error observed in the Phase I investigation, QC may invalidate the result with QA approval. The error should be clear, documented, and scientifically sound.
If Phase I finds no assignable lab cause, treat the OOS as potentially real and move forward.
Step 4: Move to Phase II Investigation – Full-Scale Evaluation
The Phase II investigation expands beyond the QC lab. At this stage, the team assumes that the result reflects a true product or process issue.
4.1 Review Manufacturing and Batch Records
Start with the batch itself.
Examine:
- Manufacturing steps
- In-process controls
- Critical process parameters
- Yield variations
- Deviations or interventions
Ask:
- Did the process stay within validated limits?
- Did operators report any abnormal observations?
- Did rework or reprocessing occur?
4.2 Evaluate Raw Materials and Suppliers
Next, review the upstream issues.
Review:
- Raw material COAs
- Supplier change history
- Incoming QC results
- Storage and handling conditions
Check whether:
- A new supplier or lot entered the process
- Variability appeared in recent batches
4.3 Review Environmental and Utility Data
Environment matters—especially for microbiology and sterile products.
Evaluate:
- Environmental monitoring trends
- Cleanroom classifications
- Water system results
- HVAC performance
Look for:
- Excursions
- Repeated alerts
- Patterns around the time of manufacturing or testing
4.4 Analyze Trends and Historical Data
One result rarely exists in isolation.
Compare:
- Previous batches
- Stability data
- Trending charts
- Customer complaints, if any
Ask:
- Is this truly unexpected?
- Have similar results occurred before?
- Did anyone dismiss early warning signs?
Step 5: Control Retesting and Resampling
Only perform retesting or resampling according to an approved SOP.
Rules to follow:
- Define the number of retests in advance
- Use the same validated method
- Justify every repeat scientifically
- Never average results to hide a failure
Perform re-testing only to confirm reality.
Step 6: Conclude the Investigation and Decide Batch Status
After completing all reviews:
- Confirm or reject the OOS result
- Document the scientific rationale
- Involve QA in the final decision
- Decide batch disposition (release, reject, re-process)
Do not rush this step. Because regulatory auditors read OOS conclusions very carefully.
Step 7: Implement Strong CAPA
Every confirmed OOS demands action.
Good CAPA should:
- Address the root cause
- Improve systems and controls
- Prevent recurrence
- Include effectiveness checks
Weak CAPA often leads to repeat observations during audits.
OOS handling is not about proving the errors from the lab or the processes. It is about protecting patients, products, and your quality system.
When QC professionals follow a structured, honest, and scientific approach, OOS results will not be a crisis. Every OOS is also a learning opportunity.
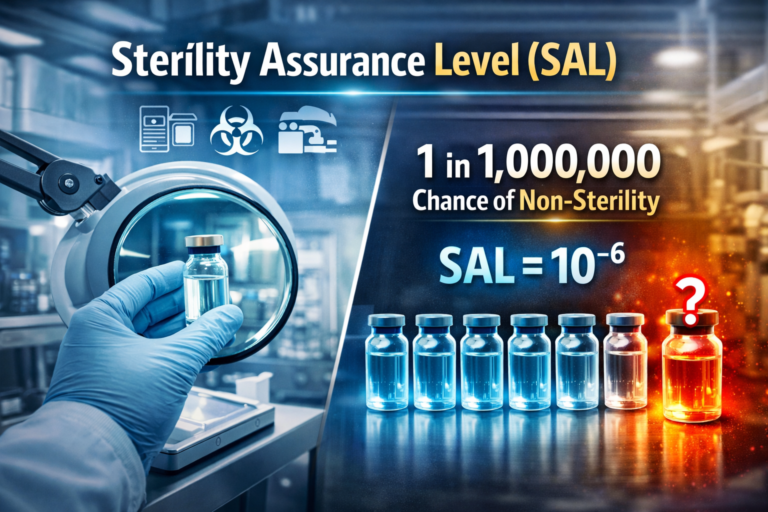
Sterility Assurance and Sterility Assurance Level (SAL) in Pharmaceutical Products